


How to Clean POS Receipt Printer Heads Correctly
Editorial TeamTable of Contents
- What You'll Need to Clean a POS Receipt Printer Head
- Safety Precautions Before You Start Cleaning
- Step-by-Step: How to Clean POS Receipt Printer Heads
- Why Are My Receipts Printing Faded?
- Best Cleaning Solution for Thermal Print Heads
- Thermal Printer Maintenance Tips for Long-Term Reliability
- Common Mistakes to Avoid When Cleaning a Receipt Printer
- Conclusion
- Frequently Asked Questions
Last Updated: September 17, 2026
What You'll Need to Clean a POS Receipt Printer Head
Cleaning a POS receipt printer head needs only a few inexpensive items, but the wrong materials cause more damage than the dirt. At Discount Till Rolls, we supply thermal paper to retail and hospitality businesses nationwide, and abrasive cleaning is a common cause of avoidable printer failure.
Gather these supplies before you begin:
- Isopropyl alcohol (70% concentration or higher)
- Cotton swabs or foam-tipped cleaning swabs
- Lint-free cloth or cleaning wipes
- A cleaning pen designed for thermal print heads
- Compressed air can (optional, for loose debris)
Safety Precautions Before You Start Cleaning
The most important step is switching the printer off and unplugging it. Thermal print heads run hot and retain heat afterwards, so touching one right after a busy service can burn you.
Beyond heat, two risks catch people out:
- Static electricity. A discharge from your hand or a dry cloth can damage the print head's control circuitry. Touch a grounded metal surface before you begin.
- Solvent exposure. Isopropyl alcohol evaporates quickly, but it is flammable. Work in a ventilated area and keep it away from heat sources.
Step-by-Step: How to Clean POS Receipt Printer Heads
Cleaning a thermal print head takes five to ten minutes. This process works for most countertop receipt printers, though the release latch location varies by model.
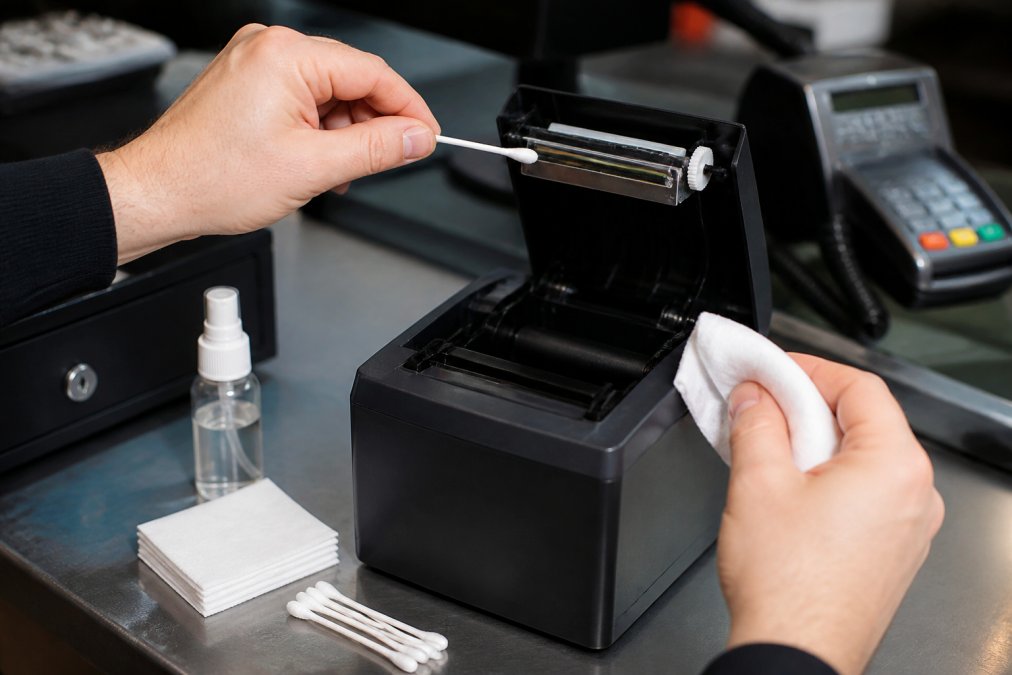
Step 1: Power Down and Open the Printer
Turn the printer off, then unplug it. Open the paper compartment using the release lever or latch and lift out the roll, setting it on a clean surface with the thermal coating face-up so it doesn't pick up grit. Wait a minute or two before touching the print head, it cools quickly, but not instantly.
Step 2: Clean the Heating Element and Platen Roller
Dampen a cotton swab with isopropyl alcohol and wipe along the heating element in one direction. Don't scrub back and forth, the element is a delicate ceramic strip, and friction kills it.
Step 3: Remove Debris and Clean Sensors
Use compressed air to blow dust and paper fragments out of the paper path, especially the paper sensor, usually a small dark window near the feed mechanism. A dusty sensor misreads paper position and triggers false "out of paper" errors.
Why Are My Receipts Printing Faded?
Faded receipts usually have one of three causes: a dirty print head, the wrong side of the paper facing the head, or expired paper. Check the paper first before assuming the printer is failing.
Best Cleaning Solution for Thermal Print Heads
Isopropyl alcohol (IPA) at 70% concentration is the default choice for thermal print heads. It dissolves the waxy binder left by thermal coatings and adhesives, evaporates in seconds, and leaves no conductive or oily film. Most manufacturers specify IPA or a dedicated thermal head cleaning pen, so it's the safest starting point without other guidance.
Why the wrong chemicals cause permanent damage
Thermal print heads aren't just ceramic. The heating elements sit under a thin protective glaze, and the bond between glaze and substrate is what fails when the wrong solvent is used.
- Acetone, methyl ethyl ketone (MEK) and other ketone or ester solvents attack the polymer binders in the protective coating. The damage is not always instant, the head may print normally for a week and then develop a permanent dead line where the glaze has lifted.
- Water alone does not dissolve the waxy residue; it spreads it across a wider area of the element and pushes it into the gaps between heating dots, which is why a water-only clean often makes streaking worse.
- Household glass cleaner and multi-surface spray contain ammonia, surfactants and sometimes abrasives. Ammonia is aggressive toward the glaze, and the surfactants leave a film that bakes onto the element the next time it heats.
- Abrasive materials, scouring pads, rough cloths, even a dry paper towel used with pressure, physically wear through the glaze. Once the glaze is breached, the element oxidises and the head is scraped, not dirty.
- Contact cleaners and electrical switch sprays are sometimes recommended online. Many contain lubricants or corrosion inhibitors that are designed to stay behind on metal contacts. On a thermal head, that residue is a contaminant.
Matching the solution to the printer
Different printers tolerate different methods, and the manual is the final word. Some manufacturers supply pre-saturated cleaning cards or pens and warn against loose liquid, which can wick into the mechanism; others approve IPA on a swab only. If the manual is missing, a supplier or the manufacturer's technical support can confirm what's approved, and an unapproved solvent can void warranty coverage.
Thermal Printer Maintenance Tips for Long-Term Reliability
A maintenance schedule that ignores where the printer sits will be wrong half the time. Two identical receipt printers, one on a dry office counter and one beside a coffee machine, will need cleaning at completely different intervals. The environment, not the calendar, should set the frequency.
Set frequency by environment, not by habit
Use these as starting points and adjust based on what you actually see on the swab:
- Dry, climate-controlled retail floor: a quick wipe at every roll change, a full clean every four to six weeks, platen roller monthly.
- Hospitality counter near a kitchen pass, fryer or steam: a quick wipe at every roll change, a full clean every one to two weeks, platen roller fortnightly. Grease and steam-borne residue build up far faster than paper dust alone.
- Outdoor or semi-outdoor settings (markets, kiosks, delivery bays): a full clean weekly during humid or dusty periods. Humidity softens the paper coating and makes it more likely to transfer onto the head.
- High-volume tills (hundreds of receipts a day): clean at every roll change regardless of environment, because the head is running hot and residue bakes on faster.
What each environmental factor actually does
- Humidity. Thermal paper absorbs moisture, so damp paper sheds more coating onto the heating element and can corrode exposed metal in the paper path. In a humid kitchen, store rolls in a sealed container.
- Kitchen grease and cooking aerosol. Airborne grease settles on the head, platen and sensor window. It's stickier than paper dust, holding grit against the element and accelerating abrasive wear, so printers near fryers need cleaning more often than receipt volume alone suggests.
- Dust and paper fragments. Loose debris works into the feed mechanism and sensor, causing false out-of-paper errors that staff often misdiagnose as a hardware fault.
- Heat and direct sunlight. Both degrade the thermal coating on stored rolls and stress internal components. Keep spare stock away from radiators, windows and the top of the till.
- Condensation. Rapid temperature changes, a printer moved from a cold store to a warm counter, cause condensation on the head. Let it reach room temperature before printing, or the first receipts will be faint and moisture will carry residue into the element.
Build the habits into the routine
- Wipe the head at every roll change. Twenty seconds prevents most buildup.
- Clean the platen roller on the same cycle as the head. Residue there causes streaking and paper slippage, and it's the part most people forget.
- Dust the paper path weekly with compressed air, with the printer off and the roll removed.
- Check the sensor window monthly. A dry cotton swab is usually enough; use alcohol only if the manual approves it.
- Rotate paper stock. Use older rolls first, stored cool, dark and sealed.
- Keep a maintenance log. Note each clean's date, the swab colour, and any print quality issues. A printer needing more frequent cleaning usually signals a changed environment or a wearing head.
Spotting wear before it becomes a failure
Maintenance is also the moment to check for damage rather than dirt. After cleaning, look at the heating element under good light. A dirty head shows an even, smeary film that wipes away; a worn head shows fine scratches, a chipped or discoloured ceramic edge, or a line of dead dots that persists after cleaning. That's damage, not dirt, plan for replacement rather than repeated cleaning.
Common Mistakes to Avoid When Cleaning a Receipt Printer
The most damaging mistake is cleaning a hot print head. Beyond the burn risk, alcohol on a hot element can cause thermal shock and crack the ceramic coating.
Other errors we see regularly:
- Using paper towels or tissues. They shed fibres that fuse to the heating element.
- Scrubbing hard to shift residue. Friction wears through the protective coating permanently.
- Skipping the platen roller. Half the print quality problems trace back to it.
- Cleaning with the printer plugged in. Static discharge can destroy the control board.
- Testing with a fingernail. Scraping the head to see if it's clean scratches it.
Conclusion
A dirty print head costs more than faded receipts: it slows checkout, frustrates staff, and pushes you toward an unnecessary replacement. The fix is a five-minute routine with isopropyl alcohol, cotton swabs, and a lint-free cloth.
Frequently Asked Questions
Can I use alcohol to clean thermal printer heads?
Yes, isopropyl alcohol (70% or higher) is the safest choice. Apply it to a lint-free cloth or cotton swab, never directly to the print head. Avoid rubbing alcohol that contains fragrances or oils, as these leave residue that harms the heating element. Let the print head dry completely before closing the printer.
How often should I clean my POS receipt printer?
For busy retail or hospitality settings, clean the print head every time you change a paper roll, or at least once a week. High-volume environments with dusty conditions may need daily cleaning. A regular maintenance cycle prevents residue buildup and keeps receipts crisp.
What are the signs that my thermal printer head needs cleaning?
Look for faded text, streaking, or blank lines on receipts. These appear when residue blocks the heating element. You may also notice a squeaking sound from friction or paper feed issues. Cleaning usually resolves these symptoms. If problems persist after cleaning, the print head may be damaged.
What should I avoid when cleaning a thermal print head?
Never use abrasive materials like paper towels or rough cloths, as they scratch the thermal coating. Avoid solvents like acetone or WD-40. Do not spray liquid directly onto the print head or use compressed air, which can push debris further inside. Always power off and unplug the printer first.